Export Data
Main Menu > Reports > Export Data
Export data is a new function in MOSES to allow users exporting data from MOSES using user defined criteria.
- Export Sales & Return
- Export Sales & Return Summary
- Export PO
- Export Receive Goods
- Export Receive Goods Summary
- Export Consignment
- Export Consignment Summary
- Export Stock
- Export Stock Lot
- Export Journal
- Export Sales Order
- Export Sales Order Summary
- Export Customers
Steps:
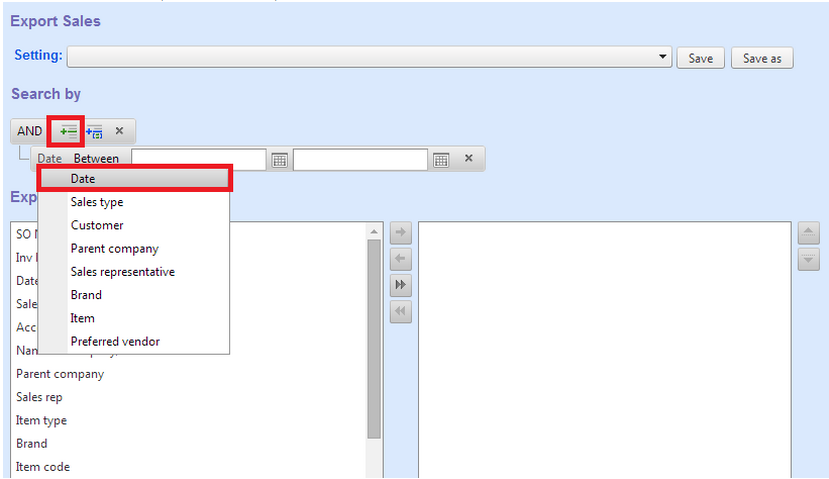
- Reports > Export Data > Export Sales;
- Next, you will see the custom sales report layout as follow;
- Based on the two criteria, click “
 ” button, select “Date” tab to add the first criteria.
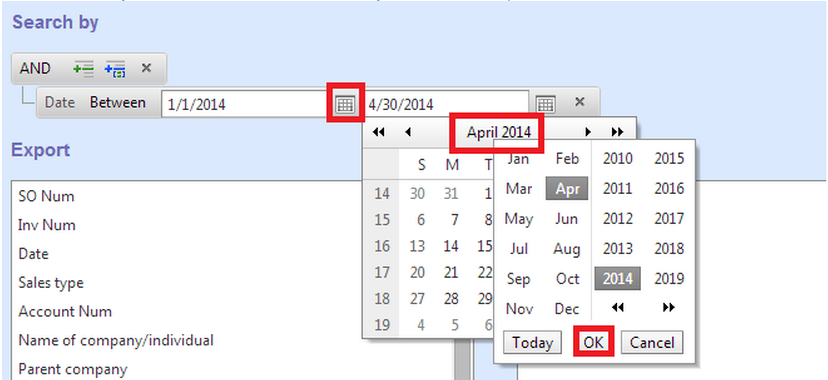
- Click “
 ”button, you will see the calendar, select the date as you need. In this example, we select the date from 2014/01/01 to 2014/04/30.
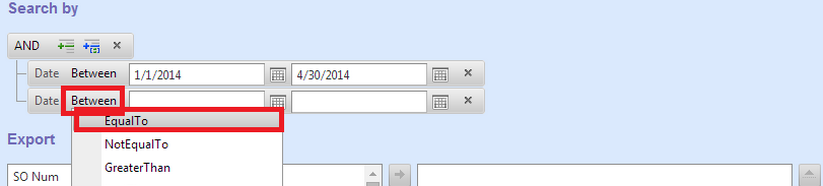
- Next, add the second criteria. Click “” button, select “Customer” tab.
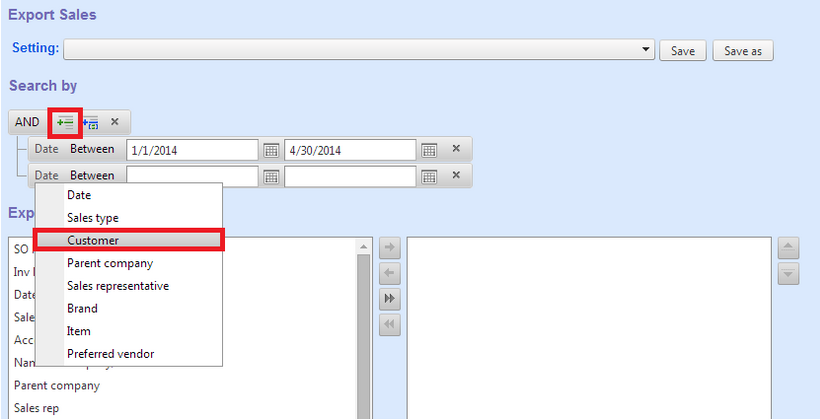
- Click “Between” tab, select “Equal to”.
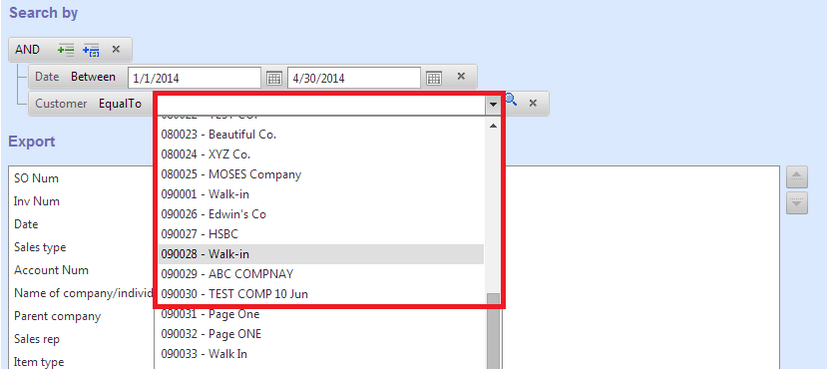
- Select the second criteria from the listed box.
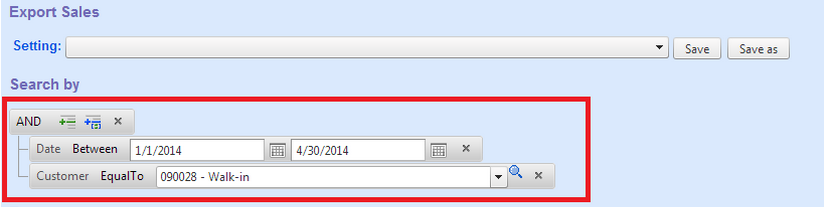
- Finish selecting criteria operation.
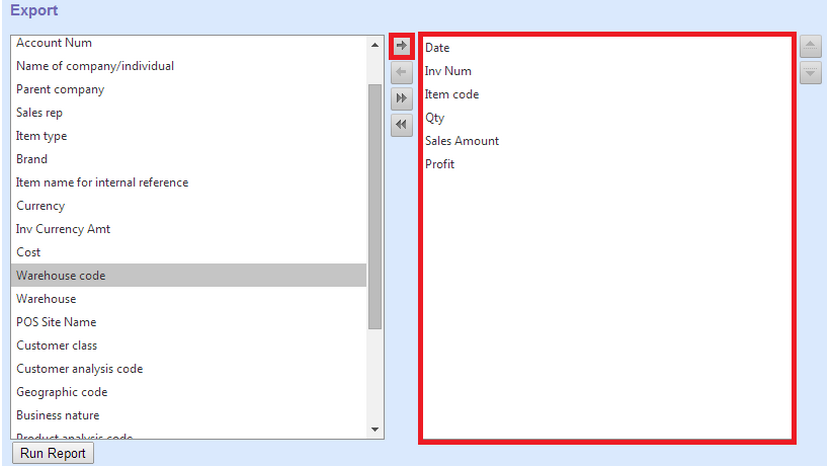
- Next, Select the export columns from the left-hand side list box, click “
 ”button to add output columns.
- Click “Run Report” button.
- Next, to let the report display the data sorted by descending or ascending, click the column item. For example, you want to see the data from “Sales Amount” in descending order.
- To export the report in excel format, click “Export to Excel”.
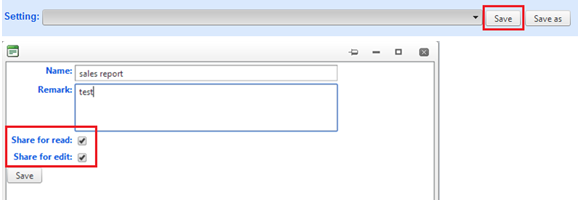
- Finally, to save the report for review, click “Save” button, you can save as sharing for read and edit, or not share.