RMA
 RMA provide a combination of delivery and procedural controls for managing return process.
Following step, we give an example of whole RMA process including ERP operation and POS operation.
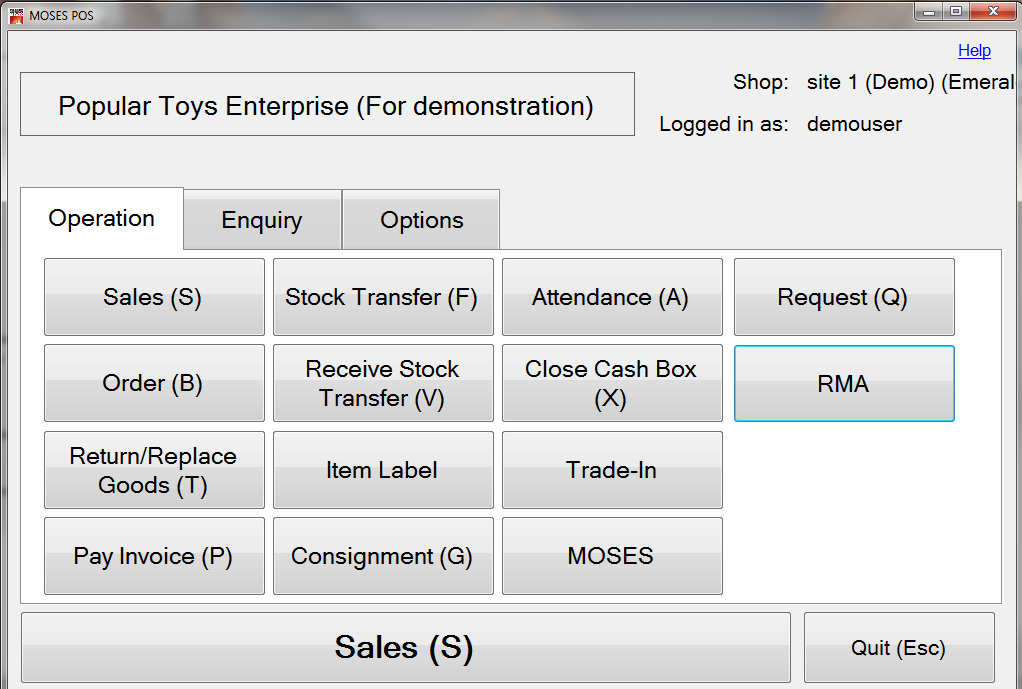
Step 1: When customer walk into the shop, sales person received the prepare to repaired items.
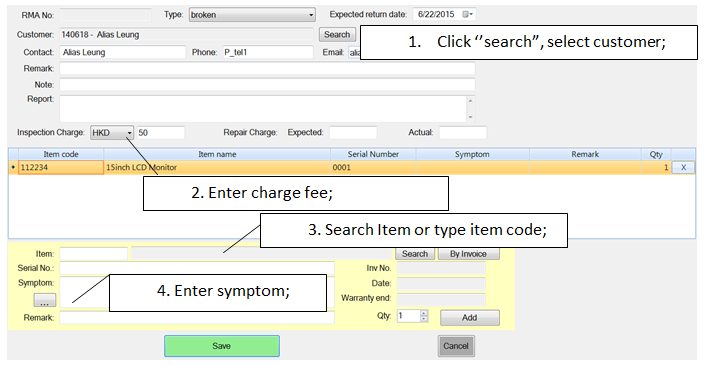
- Click add, add items;
- Click save;
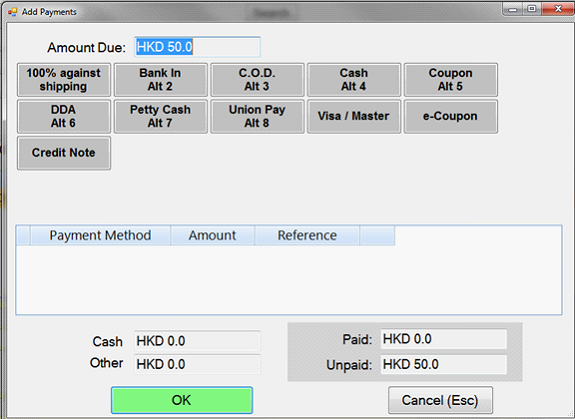
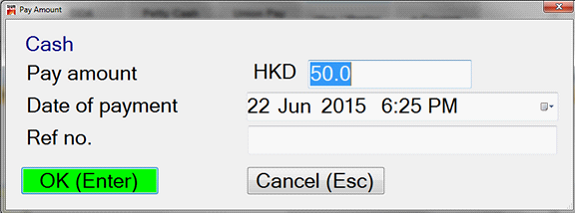
- Select payment method, click OK;
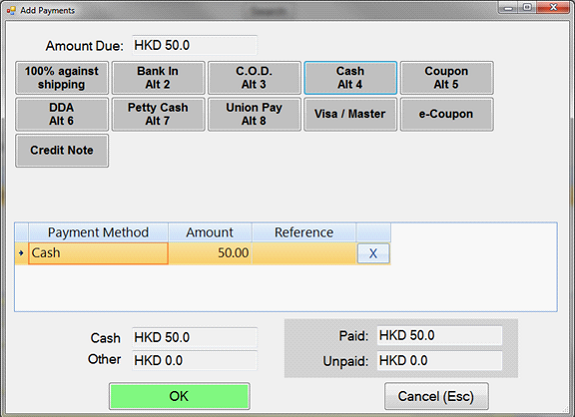
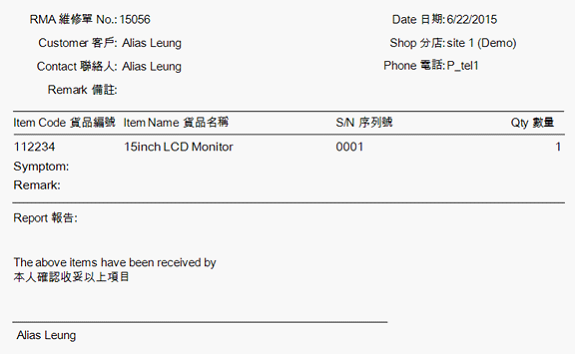
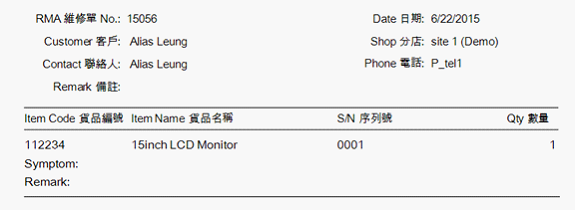
- system auto generate the invoice as below;
Step 2: Transfer item to the warehouse
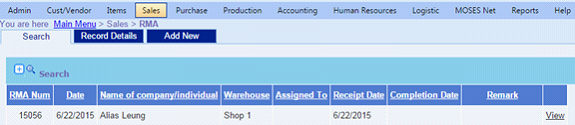
- Main Menu > Sales > RMA;
- Click view, add actual cost and parts;
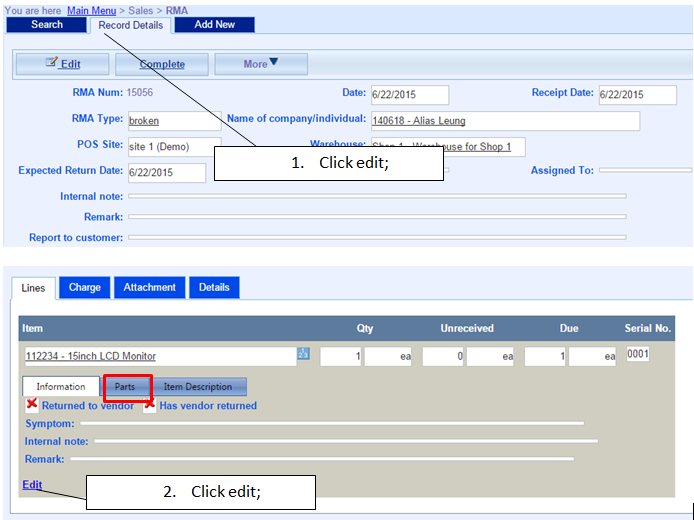
- Click complete;
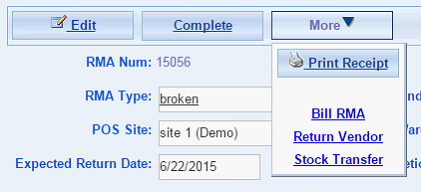
- Click stock transfer; (if the item need to transfer to another warehouse to be repaired, in this example, sales person transfer the item to Main warehouse).
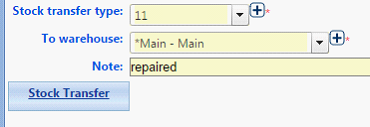
- Click stock transfer;

- Click receive;(transfer to main warehouse successfully).
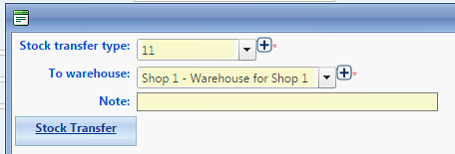
Step 3: Transfer the item back to the original warehouse (shop 1)
- Main Menu > Sales > RMA;
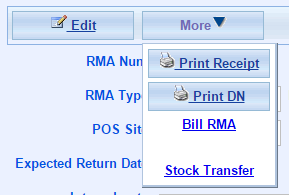
- Click stock transfer;
Step 4 : Customer pick the item up
- POS > enquiry > RMA list;
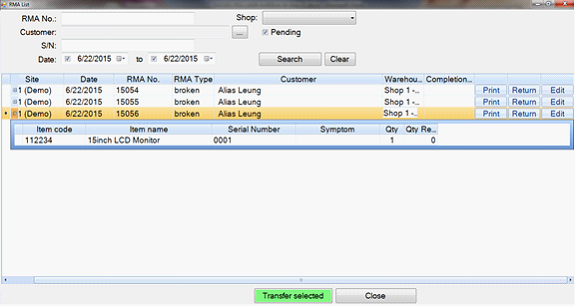
- Select the item need to return back to customer;
- Click return;
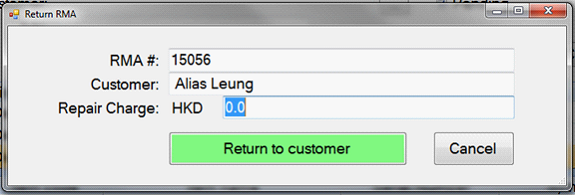
- Click return to customer;
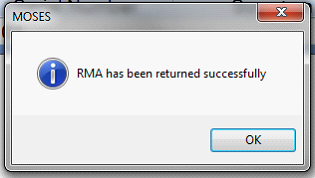
- Click OK, system auto generate invoice to customer;