How to consigned goods for vendor?

Steps
- Add a new warehouse (if necessary.)
- Add New.
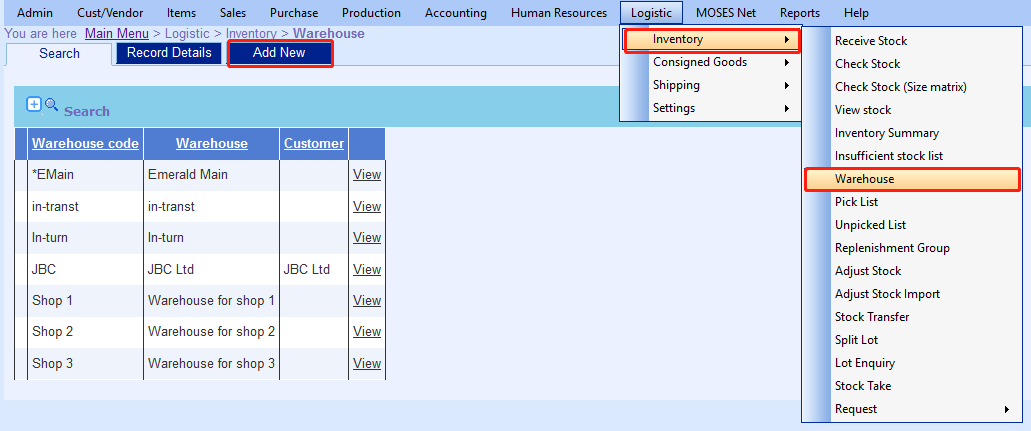
- Save.
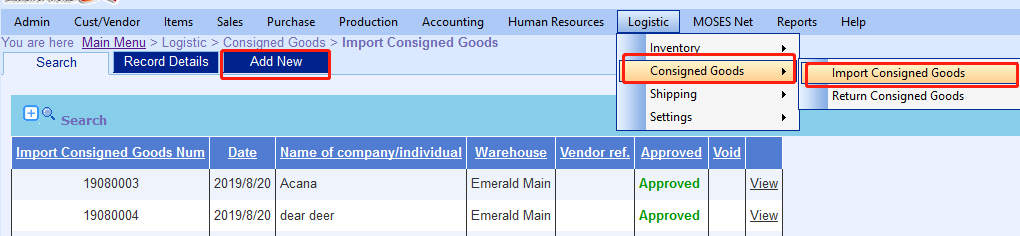
- Add New.
- Add item.
- Edit qty & price.
- Select the warehouse.
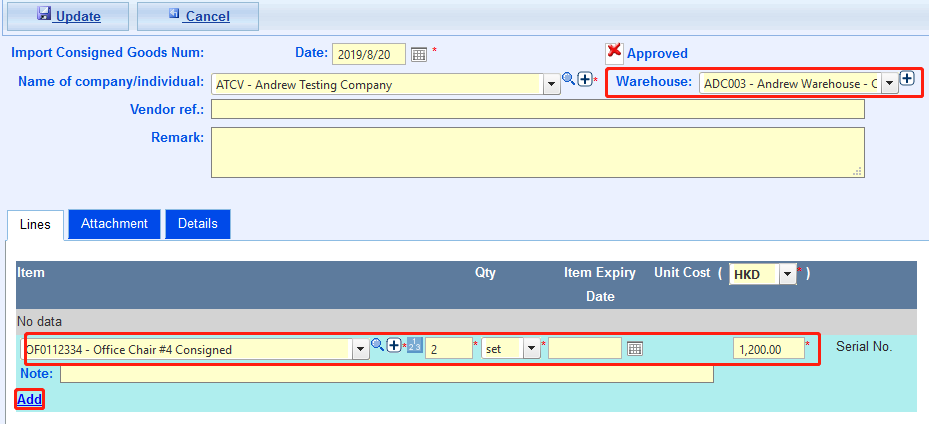
- Update.
- Create a SO.
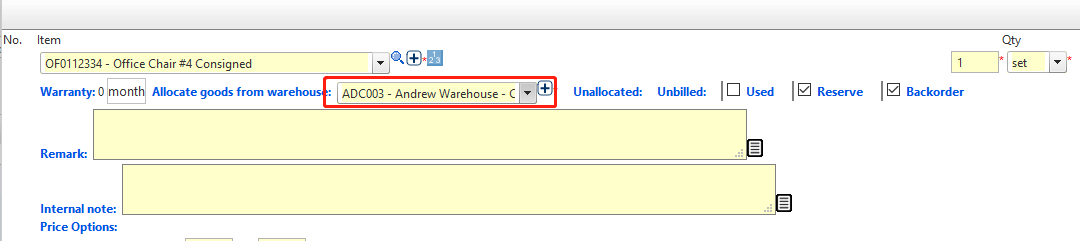
- Select the item.
- Select the warehouse.
- Save.
- Allocate.
- Bill the invoice.
- Main Menu > Purchase > Purchase Consigned Goods
- Select Vendor, Cut off date & Warehouse.
- Select the item.
- Click Create PO

- Click Add New;
- Fill in information;
- Add Excel file of items if applicable;
- Click Continue;
- Fill in any additional information;
- Add all items you wish to export;
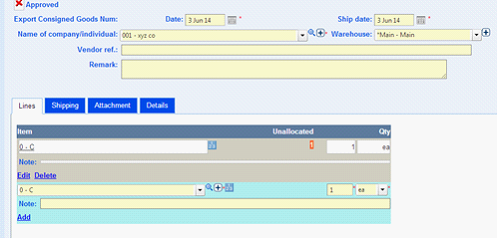
- Click Update;
- Click Allocate and Approve (if necessary).
- Done.